Tuesday, June 29, 2010

Rough Riders Rally; Final Recon of all Routes, Part 3

I just got back from a three-day trip to Marin County to finalize all the details of the Rough Riders Rally, including riding all three of the suggested ride routes with my Garmin 310xt to create the maps, elevation profiles and such. Part One of this blog post describes the suggested Friday ride for the Rally and Part Two describes the suggested Saturday ride. Now here's info about the suggested Sunday ride, briefly (I neglected to bring my camera, so I shot two photos with my phone and re-used two shots of the Saturday route which overlaps this one for a few miles).

This is the classic ride up Railroad Grade from Mill Valley to the top of Mt. Tam, also known as East Peak. No visit to Marin County is complete without this ride. The return is mainly via paved road, after returning to the West Point Inn on Railroad Grade (although several options exist for the descent from Mt. Tam to Mill Valley). This return utilizes a few miles of dirt from the Rally's Saturday ride, and some paved miles on the way back into Mill Valley from the Rally's Friday ride, however this takes a "locals only" route back to The Depot at the very end of the ride.

The final "occasion" of the Rough Riders Rally will be social time at The Depot in downtown Mill Valley, so we all need to end up back there around the same time. Total distance is 20 miles with 2800 feet of elevation gain.


Here's a map and a few photos from this recon ride, but be sure to check out the Garmin Connect page to interact with the map, elevation profile, and more! You can also see these images and more on our website.
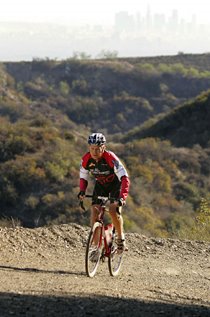
Above: Ascending Railroad Grade from Mill Valley up Mt. Tam.
Above: The view of the San Francisco Bay from West Point Inn, most of the way to the summit of Mt. Tam.
Above: The view from the summit (East Peak) of Mt. Tam, looking south.
Above: There's a lot to see from up there, so this sign helps you figure it all out.

Below are links to all the route details for all three suggested routes. If this information and these photos don't make you realize that the 2010 Rough Riders Rally is Not To Be Missed, than I don't know what does!

Links:
1.7 mile route from Acqua Hotel to Tam Bikes
Friday ride at Rally: Alpine Dam Loop (Garmin)
Friday ride at Rally: Alpine Dam Loop (Slideshow)
Saturday ride at Rally: Marin Headlands (Garmin)
Saturday ride at Rally: Marin Headlands (Slideshow)
Sunday ride at Rally: Railroad Grade up Mt. Tam (Garmin)
Sunday ride at Rally: Railroad Grade up Mt. Tam (Slideshow)
Rough Riders Rally routes index
Rough Riders Rally home and registration

We hope to see you at the Rough Riders Rally! Please join in the fun!

Rough Riders Rally; Final Recon of all Routes, Part 2

Above: My Rivendell Roadeo at the picnic area along Railroad Grade at the West Point Inn.


I just got back from a three-day trip to Marin County to finalize all the details of the Rough Riders Rally, including riding all three of the suggested ride routes with my Garmin 310xt to create the map, elevation profile and such. Part one of this blog post describes the Friday ride for the Rally. Now here's info about the Saturday ride!

On Saturday, June 26 of my recon visit I rode the route which is suggested for Saturday of the Rough Riders Rally. It is one TOUGH route. It is "only" 36.5 miles, however these are 36 and a half of the most beautiful miles one could ever ride, plus there is a total elevation gain of 5,764 feet. Most century cycling events have less climbing than that!

The route features single track, double track, fire road, gravel road, abandoned paved road, and newly paved road. Some consider this "mountain bike territory," but this route is 99% rideable by an accomplished Rough Rider on a road bike with 32mm cyclocross tyres (or on a cyclocross bike), and perhaps 90-95% rideable on a road bike with 28mm road tyres (some of the long downhill parts might make some people nervous on skinny road tyres).

This time, I rode my Rivendell Roadeo with a low gear of 38 front x 28 rear, shod with Ritchey Speedmax Cross tyres, which have a small amount of tread on them.

Here's a map and a dozen photos from this recon ride, but be sure to check out the Garmin Connect page to interact with the map, elevation profile, and more!
(All images below are in order as if riding the route.)

Also, be sure to check out the full slideshow of this route (from my previous recon rides).

Finally, I have a Pdf of the route sheet for this ride online here (use at your own risk).
Above: I stopped because this couple had a rare Otis Guy mountain tandem, then they pointed out the lovely flowers, and then I learned that the male half of this dynamic duo is Owen Mulholland, the legendary cycling journalist and author! What a treat to meet them both! I invited them to attend the RR Rally and I hope they do! (They had slick tyres on their tandem, by the way!)
Above: Our route crosses the world-famous Dipsea Trail (from Mill Valley to Stinson Beach) and I encountered the Double Dipsea race during my ride!
Above: We exit the Zen Center's Green Gulch Farm via this gate. Next up is some seriously steep single track with a few gnarly 180 degree switchbacks.
Above: During a rare nearly flat part of the Middle Green Gulch Trail. On the steep parts, you do not want to dab or you will have a difficult time getting restarted!
Above: Self-portrait with Mt. Tam behind, at the intersection of the top of Middle Green Gulch Trail and Coyote Ridge Trail.) The camera's POV is north by northwest.
Above: Cruising along Muir Beach at Fort Cronkhite.
Above: I decided to add on some more miles and climbing to this route, in part so that Rough Riders Rally participants can see and photograph the quintessential view of the Golden Gate Bridge. Alas, the world-famous SF summer fog blocked the view when I was there, but hopefully we'll get that view at the Rally! (Intersection of McCullough and Conzulman Roads. Conzulman itself is closed for the summer due to major road work, so we descend back from here on Coastal Trail.)
Above: Almost to the top of the very last climb of the day, atop Bobcat Trail just before it connects into Marincello.
Above: At the end of the ride, on the bridge along the bike path which connects the Acqua Hotel to downtown Mill Valley, with Mt. Tam behind. Good work, Rivendell!

Below are links to all the route details for all three of the suggested routes. If this information and these photos don't make you realize that the 2010 Rough Riders Rally is Not To Be Missed, than I don't know what does!


Links:
1.7 mile route from Acqua Hotel to Tam Bikes
Friday ride at Rally: Alpine Dam Loop (Garmin)
Friday ride at Rally: Alpine Dam Loop (Slideshow)
Saturday ride at Rally: Marin Headlands (Garmin)
Saturday ride at Rally: Marin Headlands (Slideshow)
Sunday ride at Rally: Railroad Grade up Mt. Tam (Garmin)
Sunday ride at Rally: Railroad Grade up Mt. Tam (Slideshow)
Rough Riders Rally routes index
Rough Riders Rally home and registration

Rough Riders Rally; Final Recon of all Routes, Part 1

Above: the view looking west from my room at the Acqua Hotel, before my ride: Mt. Tam and Mill Valley!

I just got back from a three-day trip to Marin County to finalize all the details of the Rough Riders Rally, including riding all three of the suggested ride routes with my Garmin 310xt to create the map, elevation profile and such. It's just 1.7 miles from our host hotel to the start / finish of each of the three rides. Acqua Hotel is not only perfectly located, it's also a lovely hotel with a fantastic breakfast buffet. Though it's located right off the 101, it's absolutely quiet. The view of Mt. Tam is to die for, too! I rolled into town Friday, took a photo from my room, got on my Rivendell Roadeo and hit the road at nearly 5pm. Thank goodness for long summer days!

My route Friday was the suggested route for Friday afternoon at the Rally:
On the map you'll notice a little out-and-back by Ross (1.6 miles total). That ended up being a mistake as this was intended to be primarily a road ride with one nice trail section past Phoenix Lake, Lake Lagunitas, and Bon Tempe Lake. From Ross I was intending to catch a trail and cut across to the upper part of the route, where it says Meadow Country Club, however the intended trail was closed and will be until November due to some type of public works. (I wish there were some way to delete that dogleg from this route map, but I don't think so.) Therefore this whole route will be a paved ride. It's a fantastic ride, though, truly one of the best rides anywhere in the world. It's only 31 miles, not counting the dogleg, though it took me almost three hours and might take some people four hours because of the 3500 feet of elevation gain and the million-and-one places to stop to enjoy the view and take photos. I think it's a really good Friday afternoon / arrival day warm-up route for the Rally, plus it is THE classic local road ride for this area.

Here's a map and some photos, but be sure to check out the Garmin Connect page to interact with the map, elevation profile, and more! (All images below are in order as if riding the route.) Also, be sure to check out the full slideshow of this route.
At the bottom of this post are links to all the route details for all three of the suggested routes. If this information and these photos don't make you realize that the 2010 Rough Riders Rally is Not To Be Missed, then I don't know what does!
Above: Alpine Reservoir
Above: Late afternoon sun as I cross the Alpine Dam.
Above: at the top of the climb from Alpine Dam, left turn on Ridgecrest Blvd.
Above: Just a bit down Ridgecrest Blvd. The trees provide a lovely setting at any time of day.
Above: this is one famous road, not only for cycling, but also for car commercials. Thankfully, the traffic is light and the views are mind-boggling: southbound on Ridgecrest Blvd.Above: self-portrait heading along the upward rolling ribbon of road, with the Pacific Ocean off to my right.Above: that's Stinson Beach below me, shot while pedaling (like most of my photos).
Above: a quick self-portrait while stopped near the start of the descent to Panoramic Hwy. That's the San Francisco Bay off in the background.
Above: That's the San Francisco Bay off in the background; you can also see some of the descent to Panoramic Hwy. Time to fly back down to Mill Valley!
Above: Back at the Acqua Hotel before sunset!
Links:
1.7 mile route from Acqua Hotel to Tam Bikes

Friday ride at Rally: Alpine Dam Loop (Garmin)
Friday ride at Rally: Alpine Dam Loop (Slideshow)
Saturday ride at Rally: Marin Headlands (Garmin)
Saturday ride at Rally: Marin Headlands (Slideshow)
Sunday ride at Rally: Railroad Grade up Mt. Tam (Garmin)
Sunday ride at Rally: Railroad Grade up Mt. Tam (Slideshow)
Rough Riders Rally routes index
Rough Riders Rally home and registration

Saturday, June 19, 2010

Rough Riding North-Eastern San Diego County: Ramona - Black Canyon Road - Mesa Grande - Santa Ysabel (with Garmin 310xt Review)

Above: Yours truly, next to the dam at Sutherland Reservoir. (Cycling cap by Swrve.)
It goes without saying that I never embrace technology and only "upgrade" when forced to, or, on rare occasion, when I find something so redeeming and useful that I decided to drop my usual technopathy and go for it. Such is the case with the Garmin 310xt GPS / bike computer / watch / thingamabob. Finally, one of these little units has hit the market with a battery which last long enough to be useful for those of us with an adventurous, endurance-loving embrace to our outdoor pursuits. (My previous Garmin GPS watch (model 405) barely lasted 5 to 5.5 hours, even without using the heartrate monitor feature, though it was advertised as lasting eight hours.)

Skeptical when I read that the new Garmin 310xt would last 20 hours, and boasts tons more features, I posted for feedback on our Facebook page for the Badwater Ultramarathon. Sure enough, several total legit ultrarunners confirmed it lasts 18 to 19 hours, even while using the heartrate monitor feature. That, plus its purported easy upload to the Garmin website for generating maps, elevation profiles, and analyzing data from the ride / run / hike / whatever, made this thing irresistible to me, so I indulged.

Having just gotten a 310xt in the mail and charged it up overnight, today we rode a route which we first enjoyed back on November 15, 2008. We blogged about it then, including lots of photos. Today was a new day, though, and I wanted to put the Garmin through its paces. Boy, am I glad we did! Despite being just a day short of the Summer Solstice, the weather was perfect: warm, but not hot, with sunny skies. Plus there was very little traffic, even on the "busy road" part of the route. It couldn't have been better. Also, with the first-ever Rough Riders Rally coming up in about six weeks, we really wanted to get in some dirt miles on our favorite Rough Riding bikes. Eliz rode her 1974 Williams, converted to 650B wheels with 35mm Col de la Vie tyres, and I rode my new Rivendell Roadeo with 700Cx33mm Jack Brown tyres. Good choices, both, needless to say!

The Garmin was a piece of cake to use. I hit start at the beginning of the ride, then stop at the end. How's that for easy? Along the way, while pedaling, I found it simple to navigate the buttons and menu, so that I could set it to show four bits of data simultaneously: speed, distance, elapsed time, and heartrate. Next time, I will also click the "lap" button at significant landmarks along the way, such as major turns, pass summits, and viewpoints. That will give a little more detail of the route when reviewing the Garmin Connect page about the ride afterward.

"A Garmin Connect page"? What's that, you ask? Well, after installing some simple software in my Mac, and quickly creating my own profile on the connect.garmin.com webpage, I installed a little "ANT" stick into a USB drive. Then, as soon as the ANT stick detected my Garmin nearby, it downloaded the data from the Garmin. That's right, I didn't even have to plug the Garmin into my computer. I wish my digital camera worked so simply! And here's the result, which you should also check out on the Garmin Connect webpage from whence I got these screen grabs (there you can also "interact" with the map of the route by zooming in, switching to satellite view, and the like):

How cool is that? A map which can be seen Google-style in map, satellite, terrain, or Google Earth mode, plus an elevation profile, speed/time graph, heartrate/time graph, plus data about total elevation gain, calories burned (supposedly, based upon heartrate, weight, age, etc), total time, time moving, average speed, max speed, and more, all generated automatically and posted to a webpage (I guess permanently)!

Here are photos from today's ride:
Above: this new multimillion dollar bridge on Black Canyon Road in the middle of nowhere replaces the older, smaller one at right, which worked perfectly fine 18 months ago.
Above: my Rivendell Roadeo

Above: So along this dirt road in the middle of nowhere, suddenly a nice, paved road with street lights heads off to the west, only to reconnect with our dirt road (Black Canyon Road) maybe a mile later. Along that road (Hallyeyaaw Ln) are about 12 to 20 smaller-sized, but nice, homes, all seemingly with the same floorplan. It's an "Indian Reservation."
Above: the "Indian Reservation" as seen from further up the road. Again, in the middle of nowhere, reachable only via back-country dirt roads.
Above: First I saw a snake track across the road, then I quickly spotted the snake just before it disappeared into its burrow beneath that rock. What a beauty!
Above: As we approached Mesa Grande at the north end of Black Canyon Road, we entered some beautiful pastureland with huge cows and horned bulls. The classic California summertime yellow mustard was out in force all day today.

Above: A short video from Black Canyon Road. The beautiful creek down below the edge of the road was peaceful, providing a wonderful sountrack to parts of the ride.
(Cycling cap by Swrve.)

Tuesday, June 15, 2010

Grant Petersen, Then and Now

Here are two nice interviews with one of my favorite people, not just in cycling, but in the world at large: Grant Petersen. We've been friends for 18 years, and back when he ran Bridgestone Cycles USA he offered to sponsor me for some really important, memorable, and otherwise too-expensive-for-me races (Triple Ironman in France and 24 Hours of Canaan in West Virginia in 1993).

The two nicest bikes I own, I bought from him and his Rivendell Bicycle company - one in 1995 and the other this year. Likewise, two of my most favorite and heavily ridden bicycles are my Bridgestone XO-1 and RB-1, which I received as part of my sponsorship back in 1992-1994. All are pictured below (and some day I'll do a full online slideshow for all of them). Thanks for the great "escape vehicles," Grant!

Here is the current interview with Grant from Dirt Rag's website in 2010.

Here is my interview with Grant, published in 1992. (Actually, it's a record of the very first conversation I had with him in person. He gave me a cassette tape of his favorite Bob Dylan tunes, which he'd made for me the night before, in anticipation of my interview.)

Elsewhere on this blog, you can see photos and read about two of the many rides I've made with Grant on and around Mt. Diablo, the mountain in his back yard.
Above: My 1992 Bridgestone XO-1, in just one of its many incarnations. I can't find 26x1.5" knobbie tyres like those Continentals anymore. Anyone out there know of anything similar which is on the market today?
Above: My 1994 Bridgestone RB-1, in just one of its many incarnations, this one mainly featuring Suntour components, another company which is essentially extinct.

Above: My 1994 Rivendell All-Rounder, the first one ever built to sell. As seen during a trip to Moab and Canyonlands National Park.
Above: My 2010 Rivendell Roadeo, as seen at Zabriskie Point in Death Valley National Park during one of our cycling camps.

Monday, June 7, 2010

World's Greatest Musette Bag

Above: Along the Lidder River in Pahalgam, Kashmir

Above: Test-riding a cycle rickshaw in New Delhi, India

I'm an absolute bag nut and very picky when it comes to the bags I purchase and utilize - for any purpose. For 95% of my bag needs, I rely on the built-to-last, American-made offerings from Red Oxx in Billings, MT. I literally have ten or more of them in use on a regular basis. When I head off on a roadtrip, or to produce an event, it's a veritable rolling Red Oxx commercial! There's more on my Red Oxx bags here on the Community Page on the AdventureCORPS site.

A recent
two-week trip through India and Kashmir was "bagged" perfectly with three bags from Red Oxx: the Air Boss to hold all my clothes in a space-efficient, and wrinkle-free, manner; the Mini-Ruck as my airplane carry-on with camera gear, gifts, reading material, food, and more; and a Safari Beanos 5.5 as the "bottomless pit" duffle to hold sleeping bags, ground pads, hydration packs for hiking, extra shoes, and other bulky items not needed on a daily basis by our group of three.
Above: My Red Oxx Air Boss awaits unloading from our shakari (hand-paddled water taxi) onto our houseboat on Lane Nageen, Srinagar, Kashmir.

I knew all my real packing, hauling, and storage needs would be handled well by my trip of Red Oxx bags, but I also wanted something something small and inconspicuous as my daily-use bag, especially for my large-size digital camera with extra lens, my Moleskine notebook, and the misc. items I'd want to carry every day such as hand sanitizer, energy bars, business cards, and a bottle of water.

Hopefully all of you know that musette bags began their legendary history in the military, then became de rigeur food-and-drink-hand-off bags in the professional cycling world:


Above: Musette bags put to good use in the feed zone during the Tour of Flanders.

I have used an ultra simple cotton musette by Kucharik for over a decade as a protective sleeve for my Mac laptops. When running to the PO, bank, tea shop, and the like I use the same Kucharik musette to carry small items. When I expect to have to carry a bunch of items on my bike - such as when stopping at my mailbox at the end of a long ride - I will carry the folded up musette in my jersey pocket to put to good use when needed. That particular musette has seen a zillion miles and a quadrillion uses, so I knew something along those lines, except more sturdily made and without any logos, would be perfect for my India and Kashmir trip.
Above: my very worn Kucharik musette bag, as it already looked five years ago.

Enter the recently released musette bag from Archival Clothing, a blog business I've been following lately. I ordered one just before winging it to a time zone exactly 12.5 hours later than my own. What a wise purchase that proved to be!

I used the Archival Clothing musette bag every day, taking it everywhere I went. It served many duties, including camera bag, shopping bag, and mainly just keeping everything I needed on a daily basis in a handy, low-key, easy-to-use design. The bag slowly changed color over time, taking on a more rugged, and lived-in patina. I don't plan to clean it any time soon; it keeps getting better looking. No doubt it will last forever, too.

In a few of shots below, you can see everything which I stuffed in it one day during the only "shopping spree" of the trip. That was in Dharamsala (more specifically, MacLeod Ganj), home of the Dalai Lama and many Tibetan refugees. The latter have some neat things for sale, and my two travel friends kept handing me stuff to carry in my musette, as it operated like a black hole into which we dropped everything. To sum up, this is one fantastic bag and I'll never travel without it. (I'll put it to good use on my bicycle in the near future, no doubt, and will post a follow-up report about that application as well.)

Above: You, too, can be blessed by, and photographed with, a spiritual guru for just a buck! (In MacLeod Ganj, India)Above: The Archival Clothing Musette Bag holds an awful lot of gear, and shopping finds, when necessary! Everything pictured was comfortably in the bag.Above: Tea everywhere, including from a "boat-in" tea shop along Dal Lake in Srinagar, Kashmir.